
Site identity
You can establish your site identity in a few different ways via your site settings:
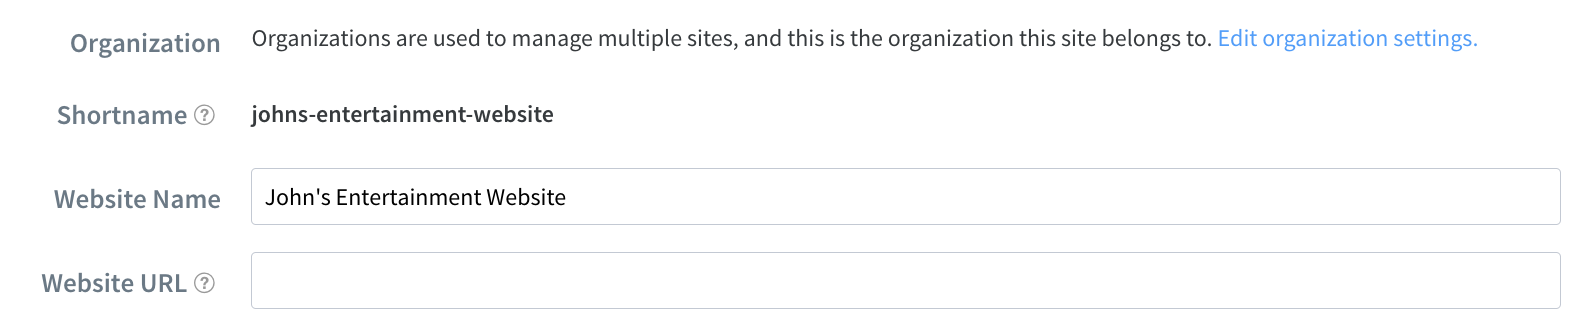
- Website name: Enter the name of your site. This will appear in Disqus feeds, email notifications, and your Community tab.
- Shortname: A shortname is a mandatory, unique identifier assigned to a Disqus site. All comments posted to a site get referenced with the shortname, which tells Disqus to load only your site’s comments and the settings specified in your Disqus admin.
- Website URL: This is the starting URL of your site. Note that this is for display purposes, and your site won’t be bound to only this domain.
- Category: Choose your site’s general category. Select “Other” if none of the choices are relevant.
- Description: To draw people in, write one or two engaging sentences about your site.

Custom fonts
Sites with a Business subscription can choose from various fonts. You can select the desired font from the Typeface section of the General Settings page. Business publishers may also request that we add new fonts to the Disqus system if they meet the following requirements:
- Are available through Google Fonts
- Have the following styles available: 400 weight regular, 400 regular italic, 700 bold, 700 bold italic, and either 500 medium or 600 semi-bold
Custom colors
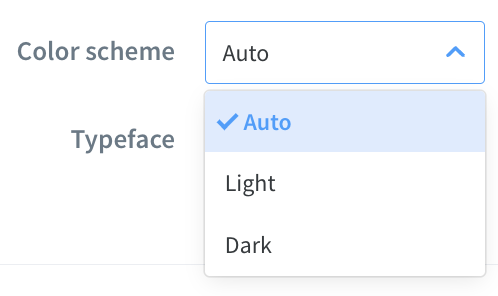
In terms of color schemes, we automatically select a light or dark color based on your site’s stylesheets. You can override the color scheme in two ways:
- Locate the Color Scheme option via the General Settings page. Choose the appropriate color scheme, or allow Disqus to choose for you by selecting “Auto.”
- Go into yoursite’s stylesheets directly and locate. Insert a
<p>tag into disqus_thread. This requires editing HTML in the web inspector. Inspect the<p>tag > expand the Computed Style dropdown > observe the ‘color’ parameter. This is the inherited color. Expand the dropdown to the left of the ‘color’ parameter to expose which specific stylesheet rule sets this color. Change the color passed by updating this text: The light scheme is loaded when the text color Disqus inherits from your site has >= 50% gray contrast: betweencolor: #000000; andcolor: #787878; The dark scheme gets loaded in all other instances.
You can customize your site’s link colors. Disqus automatically inherits your site’s link colors and will use this color for all links, the Load More Comments button, and the upvote/downvote buttons. For this to work, you must ensure Disqus can inherit the relevant CSS rules. If Disqus isn’t inheriting your site’s link color, this may require changing link colors in your publishing platform’s settings or editing your site CSS stylesheets directly.
To figure out which link color Disqus is inheriting, locate <div id=“disqus_thread”>, insert an <a> tag into disqus_thread (this requires editing HTML in the web inspector), and inspect the anchor tag > expand the Computed Style dropdown > observe the ‘color’ parameter. This is the color that we inherit.
Width, margin, and paddings
Disqus is set to fill 100% of the width of its parent HTML element and has no margin or padding set on its <div>. Disqus often looks best when its parent container gives it some margin or padding. Additionally, the width of the disqus_thread ID can be adjusted using CSS.
White-labeling
You can remove the Disqus logo from your footer if you have a Pro or Business subscription plan. Go to the General Settings page in your Disqus Admin. Uncheck the Disqus Branding option to remove the Disqus logo from the right side of the footer.

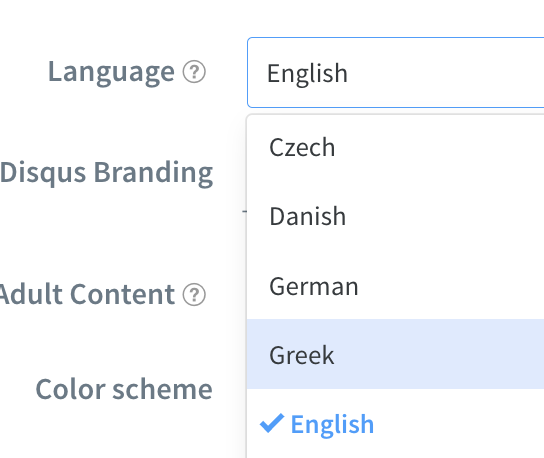
Language
You can change your site language on the Disqus Admin > Settings > General page.
If your language isn’t listed, you can request that we translate a new language by:
- Visiting the Disqus project on Transifex, which we use to crowdsource translations
- Selecting “Request language” (requires being logged in to Transifex)
- Choosing your desired new language: If your language is not listed, that means it is available for translation but requires more translations before it can appear in Disqus
- Selecting “Request team”
We review new translation proposals regularly. For multilingual websites, set a default language for every discussion in your Disqus Admin > Setup > Appearance. Using this.language JavaScript variable, you can dynamically load the Disqus embed in different languages per page.
We advise against letting users pick the language for the discussion. Creating separate forums for each language is usually better unless your moderators are multilingual. Otherwise, splitting moderation duties by language is more difficult if you use multiple languages in the same forum. If using multiple languages on a single forum, consider removing the text from comment counts entirely and overlaying the number over a comment symbol.
Avatars
As a site admin, you can add a default avatar for commenters who don’t yet have their own. Your custom image will show as the avatar for any Guest comments or comments by profiles without an avatar set. This adds a nice touch to the Disqus embed to make it feel like a part of the community.
To override the default Disqus commenter avatar, go to your Disqus Admin, click the Settings page, and then the General sub-tab. The option will appear under the Default commenter avatar. Click the Plus button to add a new image, ensure it’s bordered in blue, and click Save.

Forum Favicons automatically pull in from the URL provided in the site identity settings, so make sure you provide an accessible address so we can receive it. You may also upload a Forum Favicon from the General Settings page of your Admin panel.
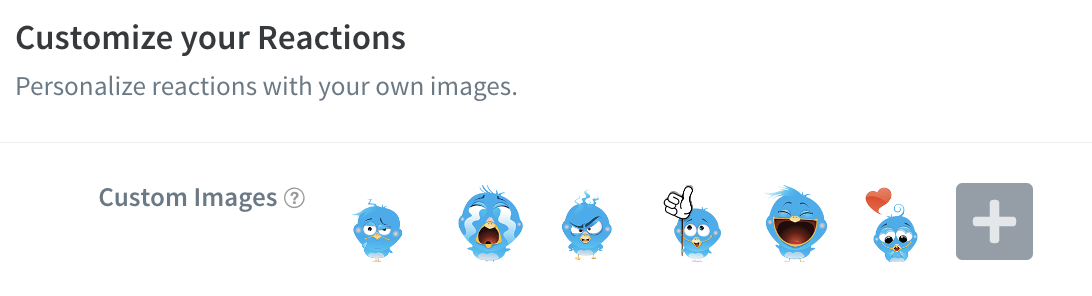
Custom Reactions
Only sites with Pro and Business subscription plans can access Custom Reactions. You can set them up from your Admin Panel, and they will appear below the “Configure and enable Reactions” section of your Reactions Settings page. Create new Custom Reactions by uploading image files from your computer in JPEG, PNG, or GIF formats (including animated GIFs). When choosing images for your Custom Reactions, please ensure the files run smaller than 5 megabytes.
To upload a custom reaction image, click the Plus button, select your images, and hit open. After successfully uploading these images, set them in the Reactions dropdown. When selecting images, please note that all uploaded images get resized to a 1:1 ratio. You can choose multiple gifs/images to upload at the same time. You can’t add images twice; our system automatically prevents duplicates. Once uploaded, select a new custom image in the Reactions drop-down like any regular Reaction image.
Badges
This feature is available with the Pro and Business subscription plans. There are automated and manual badges, and we designed each badge to have an image and a custom badge name. You can add up to eight badges to each site. Set them up from the Badges Settings tab in the Admin Panel to determine which kinds of recognition are most appropriate for your community. Set up badges based on the following criteria:
- The number of upvotes on a comment: A user will get this badge automatically when a comment of theirs receives the target number of upvotes.
- The number of comments: A user will get this badge automatically after posting the target number of comments to the site.
- The number of featured comments: A user will get this badge automatically once they have posted the target number of comments to be featured by a site moderator.
- Manual: A user will receive this badge type when a moderator adds it to their account.
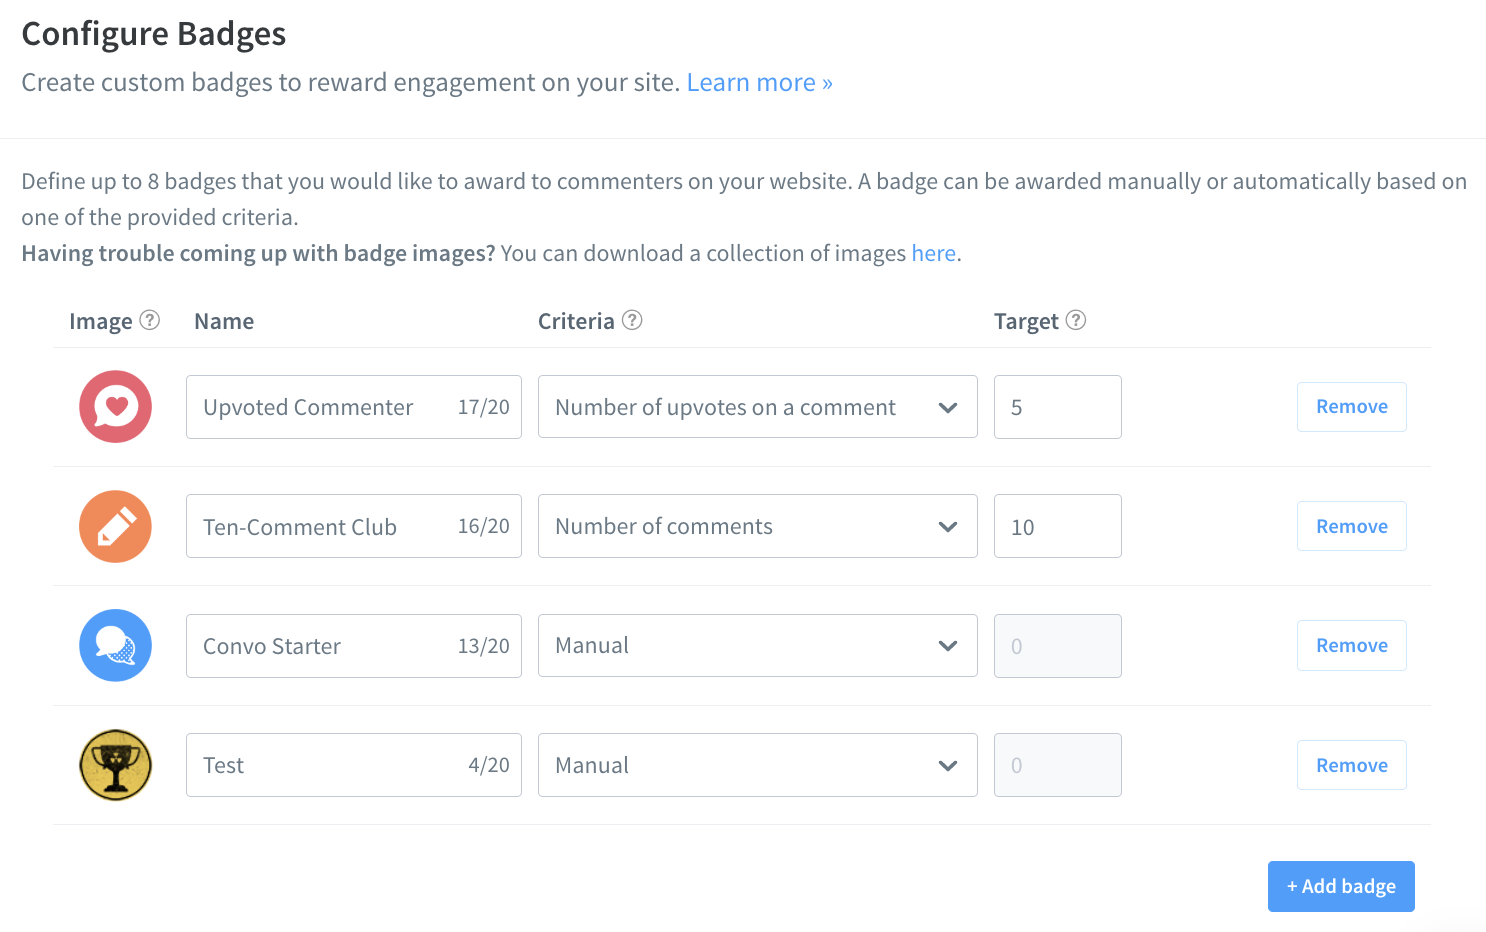
Once you’ve set up the names, criteria, and target numbers for your badges, you’ll want to add images to each one. Use .jpg or .png images under 25 kilobytes and roughly 64 x 64 pixels. As long as you meet these criteria, you can upload and use any image for your badge. If you’d prefer to use pre-created images, we have some available to download here.
Your site’s moderators have a special badge beside their comments verifying who they are. By default, this reads “Mod,” but you can easily customize this text.
Comment counts
You can customize comment count link text at your Disqus admin’s Settings > Community page. You can also translate the comment count above the postbox through our translation process.
Comment order
If a commenter hasn’t chosen a preferred sort order, we use the default you set instead. We recommend the default option of “Best” for most sites.
Social sharing icons
You can disable the Facebook and Twitter social sharing buttons at both the comment and thread levels. On the Pro plan, you can disable social sharing here. When disabling social sharing icons, a share option will still appear at the comment level. Still, it will only contain a direct link to the comment.
Voting customizations
On the Pro plan, you can now set the best voting functionality for your site. This includes:
- Upvotes and Downvotes enabled (default)
- Only Upvotes enabled
- Upvotes and Downvotes disabled
Please note that the ability to hide downvote details (such as count and voting users) is still available to sites on all plans.
Discussion prompts
Tweak the text in your postbox where your users type their comments. This text typically reads “Start the discussion” for a thread with 0 comments and “Join the discussion” for an active thread. With this feature, you can use any text you’d like with a 45-character limit. This change will take effect on all threads on your site.
Embed length on load
This feature allows you to customize how many comments appear in the embed when Disqus first loads on the page. You can resize the length to load a smaller window when it first appears on the page. By default, 50 comments load on desktop, and 20 load on mobile. Use this feature to show comments below 50 on the initial embed load. Please note that even with this customization enabled, clicking “Load More Comments” will load 50 comments on desktop and 20 comments on mobile.
Integrations
Disqus offers many integrations for your site content management system and apps like Slack, Storytlr, and Google AMP. See the complete current list of integrations here.
The Disqus elements that can’t be edited or removed
There are just a few site factors that publishers can’t customize:
- Font size
- Favorite heart buttons
- “# Comments” text above the embed: For home page comment counts, see Adding comment count links to your home page
Ensure your community fits with your brand
Beyond look and feel, you can cultivate community conversations that align with your brand in several ways. Your Comment Policy is a place to set the tone of your community and lay a foundation for what’s acceptable. It also provides a reference for making moderation decisions. If you ever need to ban a member or remove a comment, you can refer those members to the predetermined community guidelines they may have ignored.
It’s imperative to consider the type of community you’re trying to cultivate. Guidelines can cover topics like:
- Etiquette: Be polite and stay on topic. No self-promotion. Don’t flag/downvote comments because you disagree with a user.
- Expectations: Your comment will be removed for reasons X, Y, and Z.
- Privacy: Don’t post personal information.
- Moderation Settings: Comments containing links are pre-moderated. Discussions auto-close after seven days.
- Anything else that you’d like members to keep in mind while commenting.
You can add your Comment Policy in your General Settings. The Comment Policy Summary is where you’ll provide a quick snapshot of what is accepted/prohibited behavior above the comment area. You can also add a link to your entire policy on your website in the Comment Policy URL field.
Also, establish a moderation policy that does the same as your comment policy. Here are the four steps involved:
- Configure pre-moderation settings: If comment quality is a concern, you can turn on Pre-moderation for some types (e.g., comments containing links) or all comments. This sends comments to Pending; we’ll publish them once a moderator gives approval.
- Automatically close discussion threads: It might make sense to close discussions automatically after a set period, especially if moderating comments on older posts takes too much time. Generally, we recommend closing threads after 14 or 30 days.
- Create a Restricted Words list: Any time a comment or name contains a word you’ve specified in this filter, it will automatically get flagged for moderation review before publication. You can use the default sample list provided or customize it with your own words.
- Add moderators to your team: You can’t just add comments and expect a community to emerge. Active moderators are essential to building a healthy environment for diverse opinions. Add members from your team or recruit readers from your community to help moderate discussions.
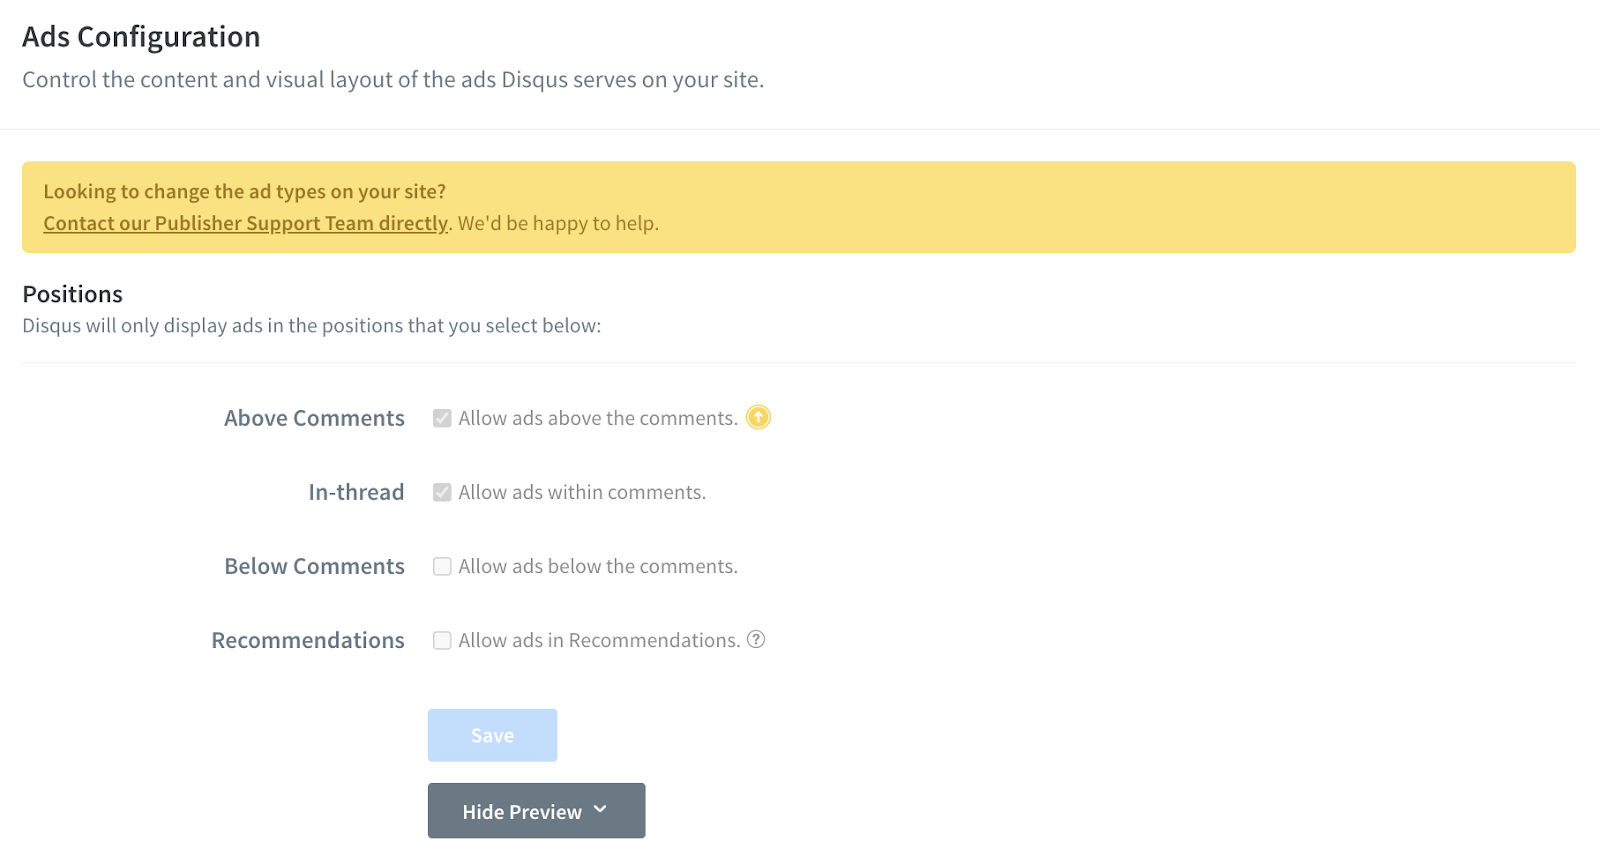
Choose from flexible ad options
Disqus offers flexible ad placement and position packages that fit into the existing ad inventory on your site. The Basic version of Disqus is ad-supported, but you can easily control which ad types appear on your site by going to your ads settings. Click Settings from the top nav, and then select Ads on the left side of the page. You’ll find a variety of settings to configure to fit the needs and appearance of your site:
- Choose your ad positions: Whether you show ads above, below, or in-thread with your comments, quality native content and premium ads are just a click away from your Ads Settings page.
- Appearance: Disqus ads will automatically adapt to your site’s color scheme and typography. If you’d like to adjust these settings, you can manually update your site’s appearance settings from the General Settings page.
- Category: Remember to select a category for your site. This helps us to serve more relevant ads to your audience based on your site’s content.
For sites where advertising is not a good fit, we have subscription options that include the ability to remove ads.